Did you ever want to rename an existing connection in Azure Data Studio? Unfortunately as of today (April 2020), there is no way to modify an existing connection group or data source connection using the GUI.
Luckily for us, Azure Data Studio (ADS) is a very powerful and flexible tool that allows us to modify many settings without the need for a GUI. All these changes can be made simple updating the settings.json file. Honestly, though, you don’t need to be an expert in JSON to make modifications to this file. I will do my best to explain to you how to take care of these changes easily and quickly.
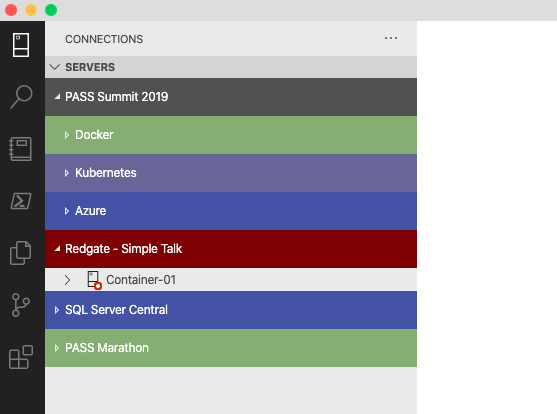
Let’s take a look at my exiting connection groups at Azure Data Studio:

I have four different connection groups called: PASS Summit 2019, Redate – SimpleTalk, SQL Server Central, and PASS Marathon. Of course, those connection groups can be different in your setup. Next, I will expand the Redgate- SimpleTalk group to show me all existing data source connections under that group:
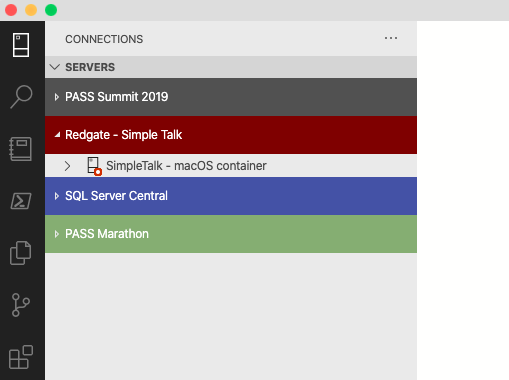
SimpleTalk – macOS container is the only data source connection under this group. This data source connection name is a little bit longer, I want to use something simpler for demo purposes. Thus, I will proceed to rename this data source connection from SimpleTalk – macOS container to Container-01.
If you are already familiar with ADS, the next step requires you to access the command palette by pressing F1 (Windows) or ⌘ + ⇧ + p (macOS).
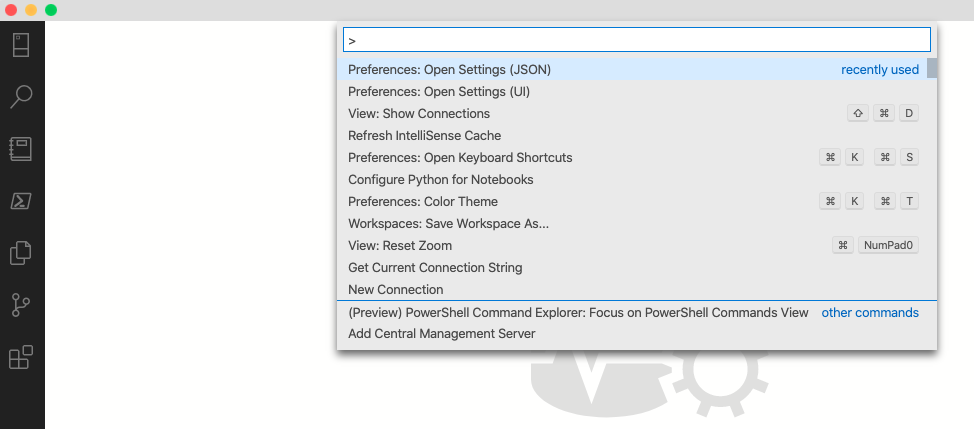
After that, select Preferences: Open Settings (JSON). A new window with the contents of settings.json will open —Now it’s time to make the change! The simplest way to find the data source connection name is to search in the JSON file as any other text file by pressing Ctrl + f (Windows) or ⌘ + f (macOS). Then enter the data source connection name in the text box as follows:
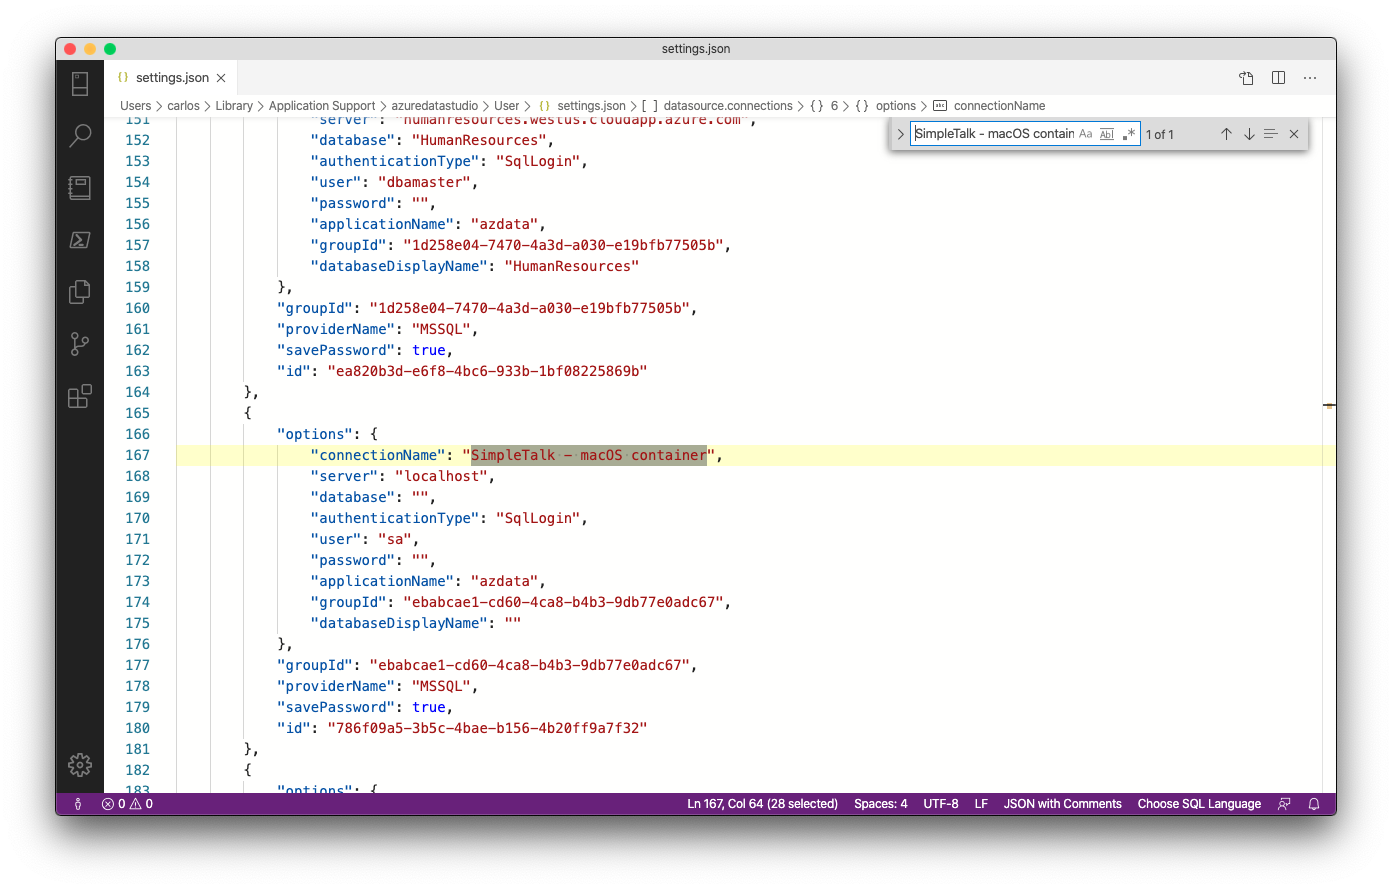
Note how ADS highlights the text in question perfectly.
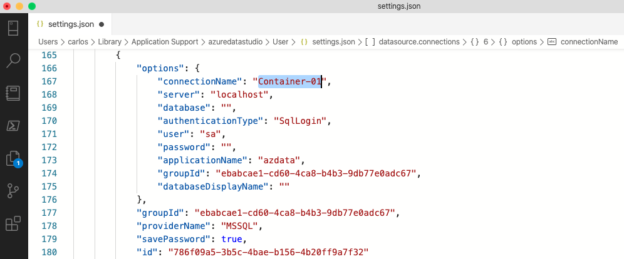
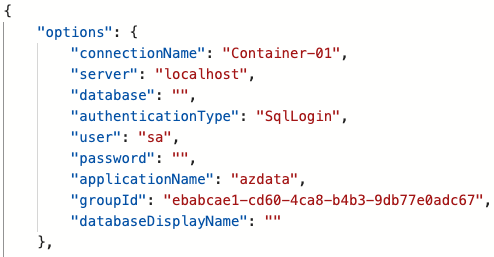
The next step is to have the data source name modified to my new name: Container-01

Note how ADS points the JSON key : settings.json > datasource.connections > options > connectionName
Once you are done with this change, simply save the changes pressing Ctrl + s (Windows) or ⌘ + s (macOS). Then close the settings.json file and open the command palette again, this time you need to select a different command for the latest changes to take effect. You want to type and then select Developer: Reload Window.
This command will simply refresh/reload your ADS environment instead of closing down the application.

Let’s take a look at the result, go ahead and navigate to your existing connection groups, then list your data source connections. The updated data source name is Container-01 as expected:
Of course, you are limited to edit just the data source name, you can also edit a series of options as server, default database, authentication type, user, password, application name, and database display name:
That’s a wrap! Hopefully, this short tip will guide you to edit your existing connections in Azure Data Studio.
Thanks for reading!
Carlos Robles is a Solutions Architect at AWS, a former Microsoft Data Platform MVP, a Friend of Redgate, but more than anything a technology lover. He has worked in the database management field on multiple platforms for over ten years in various industries.
He has diverse experience as a Consultant, DBA and DBA Manager. He is currently working as a Solution Architect, helping customers to solve software/infrastructure problems in their on-premise or cloud environments.
Speaker, author, blogger, mentor, Guatemala SQL User group leader. If you don’t find him chatting with friends about geek stuff, he will be enjoying life with his family.